Thursday, March 28, 2013

How to Choose Colors ((Texture Quilt Sneak Peak 2))


Choosing colors is always one of the hardest parts of a sewing project for me. Especially when it comes to quilts and other projects that can use a lot of colors. After hemming and hawing and getting stuck. After filling up my cart with bolts of fabric only to stop and put everything back. After leaving the fabric store empty handed and being unable to start my project again because I can't make up my mind I came up with a solution. This is a method that works for me almost every time.

I tend to prefer plainer fabrics, solids and prints that act like solids. I prefer the overall piece to make a statement, not each fabric in it. So it was almost counter intuitive for me to come up with this method because I start out by looking for a pattern with lots of colors in it. Basically as many colors as I want in the whole project need to be in this one piece of fabric. Only after I've found a pattern that I love can I start looking for other fabrics.
My pattern this time

Once I've chosen a patterned fabric, I start selecting my other fabrics drawing from the colors in that pattern.

When I'm done, often I end up not using the original pattern fabric at all. ((This time I'm using it as a back.)) I'm left with a set of coordinating fabrics.


Sometimes this method gives me something I didn't expect, but it always gives me something I like.

Enjoy.

Wednesday, March 27, 2013

Texture Quilt Sneak Peak 1


I noticed all the different textures on baby toys and had the idea to make my little on a quilt that would have many different textures of fabric. Minky dot, furry, silky, ribbed, etc. However those fabrics are a little more expensive and put the project a bit out of my price range. So I left the idea in the back of my mind.

Then my little one came along. The first object my little one ever wanted to grab and touch was her burp cloth. After that, a seat belt. After that, her blankets. Then my clothes. Then stuffed animals. For about a month she loved anything fabric, but would completely ignore any plastic toys I offered her. Different textures in my clothes especially seemed to fascinate her. Even still, at 4 months old, she'll play with softer plastic toys, but mostly ignores hard ones and loves anything fabric.

That brought the idea back and I went searching for ways to make the project more affordable. Eventually I had a stroke of luck and stumbled on the post Textured quilt sampler free project on the site Sewn Up byTeresaDownUnder. TeresaDownUnder described the project as “a sampler quilt that explores texture in fabric”. 
One photo of the textures from TeresaDownUnder's Tutorial

There are 25 different texture tutorials to choose from. I could make many textures out of normal cotton quilting fabric. This drastically cut the cost of the project, and made it so I could be more picky about which pre-textured fabrics I did buy.

Each of the textured blocks in TeresaDownUnder's tutorials came out to make a 5" square. As I was looking around for quilt inspiration I found this very simple Whimsy: Charm Pack Baby Quilt tutorial on sew4home. I loved that a border would separate each texture. I decided to use this tutorial as a base for my quilt.


Monday, March 25, 2013

Foaming Hand Soap Refill DIY


You will need:
- 3 tablespoons Liquid Dish Soap
- 2/3 cup Warm Water
- Empty foaming soap dispenser

If your soap dispenser is a little gummy, wash it with warm water. Fill with warm water and pump a few times to clean the inner parts.

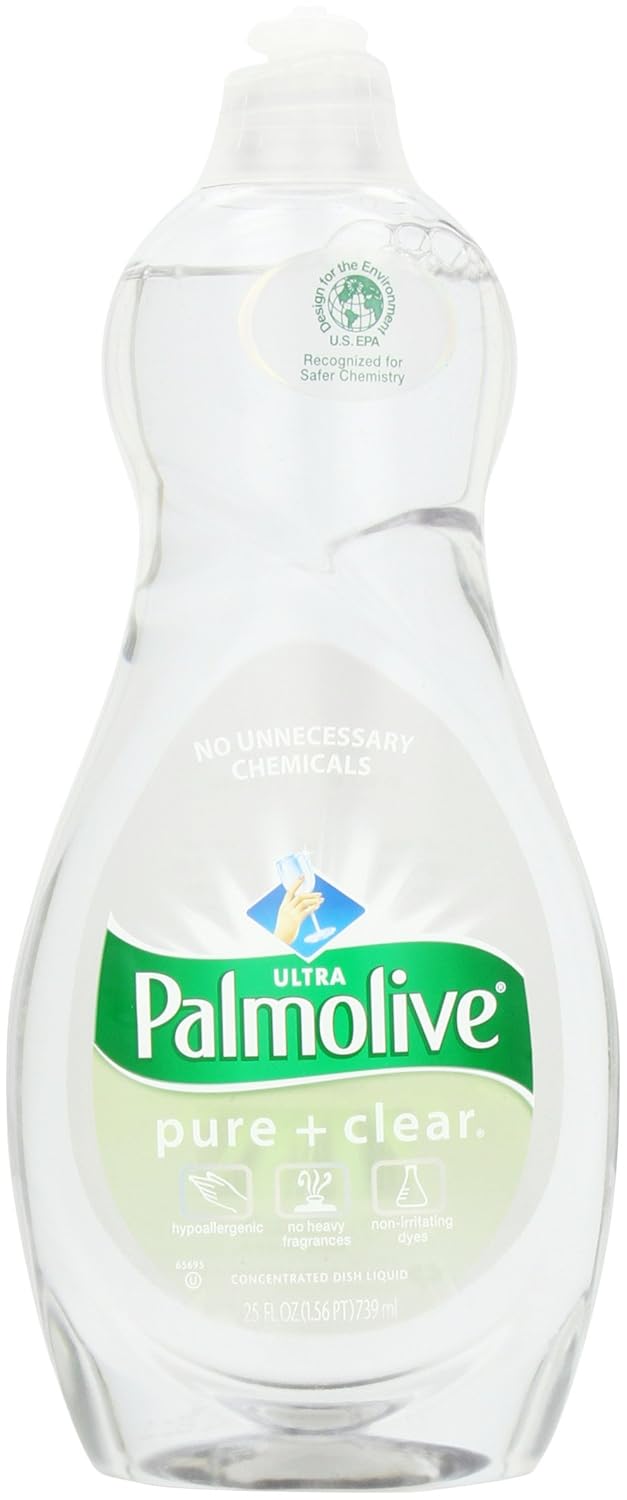
Pour the dish soap into the dispenser. It may be easier with a funnel. I used Palmolive Pure + Clean, because that is what I had on hand.


Add the warm water slowly. Then stir gently until soap is dissolved in water. I used a chopstick to stir. You can do this by swirling the bottle. Don't shake.

Replace the lid and pump a few times until soap comes out foamy.


I'm told that you can use liquid hand soap, shampoo, shower gel, or pretty much any liquid soap to get the same results. I haven't tried all of those yet. I have tried a creamy hand soap and that was a mistake. I love creamy soaps for using straight, but not for foam. It probably works well enough, but it produced a slimy feeling foam. Since texture is a big reason I like the foam, that just didn't cut it.


Cost will vary based on what base soap you use. Right now you can get 50 ounces of the soap I used on Amazon for $7. In my calculations are right, you should be able to get about 33 refills from that which comes out to about 21 cents a refill! The best deal I've found for premade refills is about $1.00 a bottle.

Enjoy!


Sunday, March 24, 2013

A Treat For Two: Chocohotopots

My husband's mother loves to bake. I gain about 5 pounds each time she comes into town and I enjoy every delicious calorie of it. Lucky for my waist line she only comes into town 2 or 3 times a year and I'm usually able to loose the weight pretty quickly when she leaves (except for this last time with the baby, recovering from delivery, depression, etc. losing weight is going a lot slower).

Mommy-in-law considers family recipes to an important part of recording her personal and family history. She frequently sends us updates with recipes from grandparents, new things she's tried, and my husband's favorite childhood foods.

This is a favorite recipe of my husband's family, adapted to serve just the two of us. My mother-in-law wrote in her recipe book:
This is what to eat when your chocolate level is a quart low. It is deeply chocolate and very quick to prepare and cook. Each of my children headed off to [college] with this recipe, a mug and a wire whisk.
This recipe is amazing. It turns out cake-y and gooey almost like a mini lava cake. Adding vanilla ice cream  gives it this beautiful hot/cold chocolate/vanilla contrast. It is a multi-sensory experience. I love it.

We like to make it anytime we're having a hectic day. Today was one of those days. We have a million things to do (all good things, but a lot of rushing) and the weather is gross. Nothing like a good strong dose of chocolate to give us the gusto to get out the door and start on our to do list.

Ingredients:
- ¼ cup Unsalted Butter
- 2 ounces (about ¼ cup) Semisweet Chocolate Chips
- 1 pinch Salt
- ¼ teaspoon Vanilla
- 6 tablespoons Sugar
- 1 large Egg
- 3 tablespoons Flour

Instructions:

Melt the butter and the chocolate chips together. Add the salt, vanilla, and sugar to the melted mixture and stir. Beat in the egg. Add the flour and stir until smooth.

Spray two 1-cup ramekins with non-stick cooking spray and divide the batter evenly between the two.

This is where my oven safe dishes saved me again. I don't own 1-cup ramekins. One day I hope to have money and space for more kitchen dishes and gadgets, but today is not that day. See my post on DIY Taco Bowls for more details.

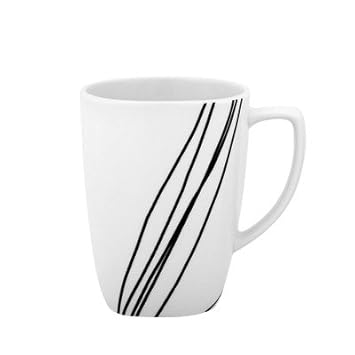
Instead of ramekins, I used mugs. Below is a link to the mugs I own. They work great and are fun to eat out of. Just make sure your mugs are oven safe. This is very important. Otherwise they might shatter and that would be bad. Less dangerous, but still important make sure your mugs hold at least 1 cup. Otherwise you might have a huge mess and ovens are a pain to clean.

Make sure your ramekins (or mugs for most of us) are stable in the oven. If they are too small to be stable on the oven rack, put them on a baking tray.

Bake at 400 degrees for 22 minutes.
Top with ice-cream and serve.

This is best served very hot. You'll probably need to use towels or hot pads so that the hot mug doesn't damage counters, tables, or your skin. Be sure to take extra precautions if serving to children.

Enjoy.


Thursday, March 21, 2013

DIY Taco Bowls

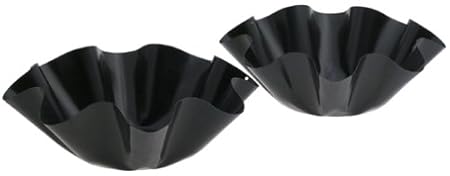
There are some dishes specially designed for making tortilla bowls. I haven't tried them out myself, but they look like they would be great if you are picky about having a uniform shape and/or you have extra money and space in your kitchen for very specific gadgets.

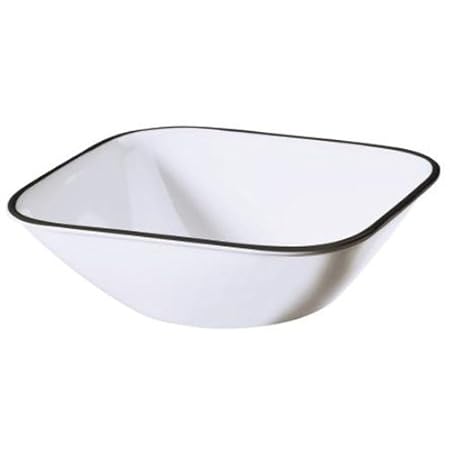
I am not so picky and have very little money or space, therefore I wanted to find a way to make taco bowls without having to buy and store extra dishes. Thankfully my regular set of dishes is oven safe, so my regular cereal bowls work for this purpose.


These bowls were also perfect because the flat bottom meant that the finished tortilla bowl was very stable and could be used on a plate.

Materials Needed:
- Oven Safe Bowls
- Non-Stick Cooking Spray
- Tortillas

Spray the bowl with cooking spray. Insert the tortilla and shape as desired. Spray the top of the tortilla with nonstick cooking spray.

Cook at 325 degrees for about 15 minutes. Check after 10 min. Remove tortillas from the oven when they start to get crunchy. Don't worry if they aren't super crunchy yet. They become more crunchy as they cool. Allow the tortillas to cool in the bowl at least until they are stiff enough to hold their form on their own.


Fill with lettuce and top with your favorite tex-mex style ingredients (i.e. taco meat, shredded cheese, beans, sour cream, olives).

These would also be fun as salsa or dip bowls at a party.

Enjoy!


Friday, March 15, 2013

Happy Pi Day!


We thought it would be a great idea to share pie with all of our friends in celebration of yesterday's holiday. We pulled out our Make-a-Mix cookbook (which is actually amazing for making food in bulk, not just for making mixes to store) and set to work making 10 chocolate pies.


The image at the top of this post was supposed to be a chocolate pie like that beauty on the lower left hand corner of the book cover. However, we learned a very important baking lesson. Apparently cornstarch (our thickening agent) will thin out if heated at very a high temperature or if stirred after the thickening process takes place. There's a reason the recipe said heat on medium...

Therefore, our gift was actually a little more like a chocolate chowder in a pie crust pastry bowl which, when you think of it like that, actually sounds pretty awesome. Even if it is a little lot more messy. Good thing our friends all have a great sense of humor.

tl;dr
liquid chocolate, respect the cornstarch, happy pi day.

$7 DIY Sofa Table


Our living room furniture was a gift from my in-laws. They were downsizing around the time of our wedding. They had an extra couch, chair, and coffee table that they passed on to us. This was a huge blessing. Otherwise we might have been sitting on buckets for a few months until we saved up for some Ikea furniture. What's more, the furniture they gave us is high quality. It will last for years to come. There is only one downside. This furniture was not designed for a small apartment. Our living room is very small. Our living room furniture is not very small.

After trying many arrangements we've finally (almost 2 years later) found an arrangement that really works with the flow of the room and doesn't block the air conditioner. The only problem is that the coffee table is nowhere near the couch. It isn't a huge deal, but I really wanted somewhere to put a reading lamp, for guests to put their drinks down without worrying about them getting kicked, and what not.

I decided a shelf or table behind the couch was the best option to keep the layout of the room. It had to be wide enough for a cup, but not much wider because we are short on space. In the end we decided on a table because it could be easily moved and didn't put extra holes in the wall.

Supplies

Wood
1 2x4 7' long (or the length of your couch)
3 2x4s 29" long (or the height you want the table minus 1.5 inches)

Hardware
4 2"x5/8" corner braces
4 3/4"x1/2" corner braces
20 screws appropriately sized to the corner braces (often these will come in the packs with the corner braces.

Assembly

Use the larger corner braces to attach the two end supports onto either end of the table top (locations marked with red arrows). 

Use the 4 smaller corner braces to attach the middle support to the bottom middle of the table top (locations marked with green arrows). Stagger the 4 braces on the center support to avoid having the screws running into each other.
Cost

4 L Brackets: $1.00
4 L Brackets: $0.50
2 2x4x8': $5.24
Wood Cuts: Free at most major hardware stores

Total : $6.74 (before tax)

Photos
On it's own it is a bit wobbly. But when it is between the couch and the wall it is very sturdy. I've pushed on it and it doesn't wiggle at all.

From the front you can hardly tell it is there.


Fulfilling it's primary function perfectly.

Future Plans

This table is already in place in my living room and completely functional. I labeled it as a work in progress because it is still a bit ugly. I have a few ideas on how to stain or paint it to make it look really cool, but until I decide which idea to go with it will remain as raw wood. Comment with any suggestions.

Wednesday, March 6, 2013

The Latest Mommy Guilt : Plagiocephaly

Tomorow we get to go to another doctor. We're visiting a specialist of some sort to talk about my baby's head.

My little one was born with a pretty misshapen head. Her head size was in the 97th percentile (bigger than 97% of all babies her age). My hips are a bit bigger an I'd like them to be, but they are most definately not in the 97th percentile.

She was a big baby. I'm not a big person. I have some extra fluff right now, but I'm fairly short and have a narrow bone structure. I fully expect her to be several inches taller than me before she becomes an adult.

Towards the end of pregnancy I looked pretty ridiculous. My belly was so big that even my maternity clothes kept rolling up or down and I had a hard time keeping my baby bump covered.

Her doctor tells me she was probably wedged up against my pelvic bone for a while while she was forming. She was born with a misshapen head, a still neck, and a click in her hip. Even though there was nothing I could have done about it, I felt a lot of guilt. It was my body that didn't give her enough room. My body... Me... My fault.

I cried over that so many times. I had hurt my baby. I wasn't giving her the best start in life. Thankfully the hip resolved on its own within a couple months, and her head shape started to even out. I started to stop feeling guilty all the time... At least about that.

Now they've referred us, the guilt is back. Her head has evened out quite a bit, but it's a slow process. They want to help it along a bit while she's still young and adaptable.

I keep wondering what more I could have done. We kept the bassinet so she'd face a blank wall if she turned on her flatter side. We tried to reposition her head after she'd fall asleep. I'd have her in a moby wrap for a good portion of each day. I'd sit on the correct side when we were both in the back seat of the car. We got an upright baby jumper as soon as she had enough head control. She even takes a lot of her naps on her side in my arms.

Really, she loves being on her back. She likes to be able to play and look around on her own. For the first 3.5 months tummy time was a torture for both of us no matter what tricks we tried. Her head being disproportionately large compared to her body, she has a harder time keeping her head up in front of her. Only on the last couple weeks has she stopped screaming through the whole thing.

I'm hoping since her head control and tolerance of tummy time has changed so much recently the new doctor will will suggest more exercises and observe her for a while. I don't want a helmet. I feel that I have wronged my child first by not having room for her and second by giving in too easily to what she wants.

I don't want my mommy fail broadcast to everyone who sees us.

Friday, March 1, 2013

Trenza (filled braided bread) Recipe/Tutorial


I served as a missionary in Guatemala for a year and a half. While I was there I made friends with a baker. One night he invited us over to his house for an activity. He taught us to make trenzas (spanish for braids) which are a delicious filled bread. Once I came home I adapted the recipe for ease and to fit the ingredients that are common in the States.

Dough

You can use your favorite pizza or crescent dough brand or recipe. I like to use my Uncle's (http://zyzmog.blogspot.com/) pizza dough.

Makes enough dough for 2 Trensas
1 C. warm water
1 Pkg. yeast OR 1 Tbsp. dry yeast
1 tsp. sugar
3-1/2 C. flour
1-1/2 tsp. salt
2 Tbsp. oil

Dissolve yeast. Add sugar, salt and oil to water. Then add 2 cups flour and mix. Gradually add rest of flour. Put in greased bowl and let rise 1 hour.


Fillings

Today I am making a Chicken Alfredo Trenza and a Chicken Pesto Trenza. You can use pretty much any fillings you like. Precook any raw meat to make sure it gets cooked through.

Filling for Chicken Alfredo Trenza
2 chicken tenderloins (already cooked, seasoned, and cubed)
3-5 rounded tablespoons alfredo sauce
1/2 cup frozen corn

Filling for Chicken Pesto Trenza

2 chicken tenderloins (already cooked, seasoned, and cubed)
1 cup shredded colby-jack cheese

2-3 rounded tablespoons pesto

Other Filling Ideas

Here are a few of our favorite flavors.

  • Sandwich Style - Deli meat, sliced cheese, your favorite condiments (ketchup, mayonnaise, and mustard). This is how my baker friend in Guatemala liked them best.
  • Pizza Style - Pizza sauce, shredded cheese, and your favorite pizza toppings.
  • Loaded Baked Potato - shredded cheddar cheese, sour cream, bacon bits, chives, and baked potato slices (optional)
  • Breakfast - Scrambled eggs, sausage or bacon crumbles, shredded cheese.
  • Sausage, Baby Spinach, Mozzarella, and Pesto.
It's a very versatile recipe. Feel free to substitute your favorite fillings. If you find a good combination comment and tell us about it.


Assembly

Preheat the oven to 425°F (or whatever temperature your dough recipe calls for).
Roll out the dough into a rectangle. Spread the filling along the center of the rectangle. I usually spread any sauce on first and the more solid ingredients on last because that makes for less mess.

Cut each side as shown. (I'll often use a clean pair of kitchen scissors for this step). Each strip should be about 1 inch wide.
Next you will begin folding the strips over top of the filling. Pick a corner to start with and fold that strip over first. Then fold the strip across from the first one. Then, the strip next to the first one. Continue alternating sides until all the strips are folded across.
If at any point the strip is too long you can cut off the excess.  I usually roll the extra bits into breadsticks and top them with herbs and cheese. The last strips especially usually need to be cut short.
Top sprinkle with herbs or finely shredded cheese and bake about 25 minutes. Check after 15 min. The time to bake will vary based on the thickness of the dough, the moisture level of the filling, and other factors. The trenza is ready to eat when the bottom is no longer doughy and the top is golden brown.

Enjoy!


LinkWithin

Related Posts Plugin for WordPress, Blogger...